All models of Cyclops and Sasquatch have a built in self test that generates a magnetic field and measures it to ensure that all components in the detection path are operational. This is used during manufacturing, but can also be performed in the field.
WHAT YOU NEED
Before planning to self test a sensor, you should make sure you have:
- A PC with Vision Device Management installed
- A Cyclops IS/ExP or Sasquatch.
- A Link Device Connection (This provides both communication and power) with USB drivers installed.
CONNECT VISION
Follow these steps to physically connect the sensor using a Serial connection and establish a communication session.
SET THE SENSOR MODE
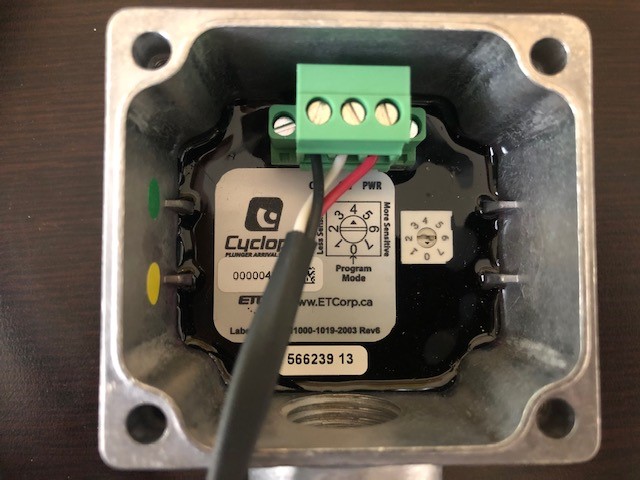
- Ensure that the switch on the physical sensor is set to Program Mode (0).
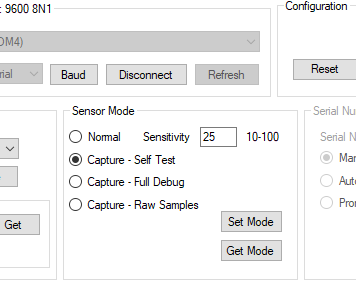
2. Set the Sensor Mode in Vision by clicking Capture – Self Test and clicking Set Mode.
3. Set the switch on the physical sensor to a non-zero position (dial setting 4 is the default operational setting).
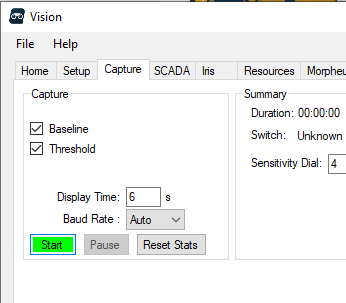
4. Navigate to the Capture tab in Vision and click Start to begin the capture.
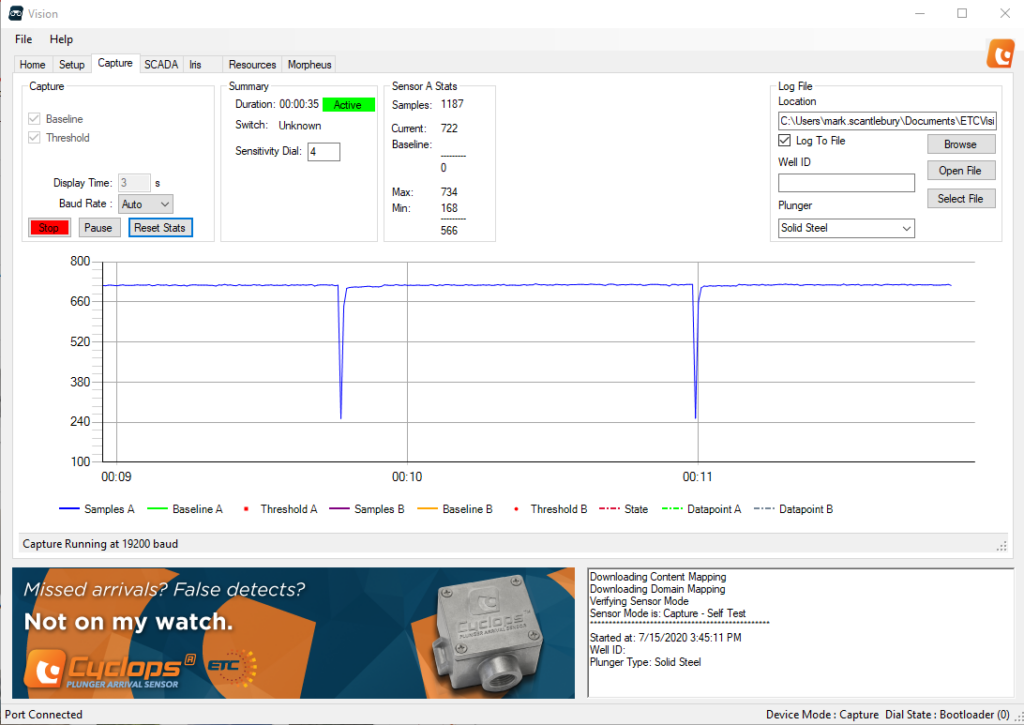
WHAT should I see?
During the capture, the self test will alternate between generating a magnetic field and not. You should see the signal peak down (or be inverted and peak up) as in the picture below.